
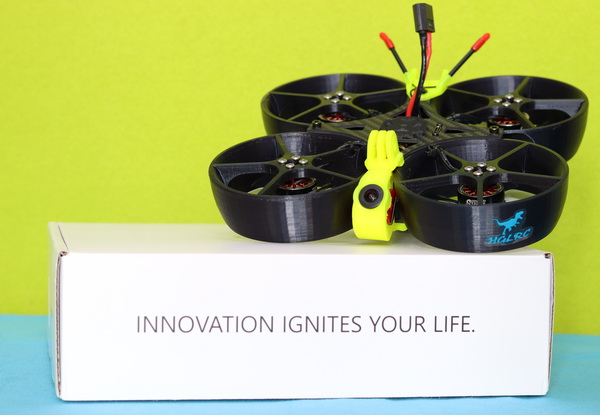
HGLRC RaceWhoop30 review: Fly, Crash, Repeat!

Last month I was contacted by HGLRC regarding the opportunity to review their upcoming product. RaceWhoop is a trendy concept in the FPV community due to its power and endurance. It uses big motors and 3D printed PCTPE blade guards, perfect for bando and racing. They have so much confidence in this drone that they requested me to do a crash test.
The HGLRC RaceWhoop will be released in two sizes and two power options (4S and 6S). While the 3″ version has 2105.5 3600kv (4S) or 2800kv (6S) motors, the smaller 2.5″ 2004 3000kv (4S) & 1800kv (6S) motors. In terms of design, the RaceWhoop30 and RaceWhoop25 are almost identical, both adopt pusher designs with reversed motors.

HGLRC & Free Zillion RaceWhoop series highlights
- Carbon fiber frame with PCTPE filament duct blade protectors;
- Two propeller size options (2.5″ and 3″) and two power versiones (4S and 6S);
- Zeus F722 MINI flight controller
- MPU6000 and STM32F722 RET6 CPU;
- Built-in Betaflight OSD;
- BMP280(I2C) barometer;
- DJI FPV ready port (Air Unit and Vista);
- Zeus 28A BL_S 3-6S 4in1 ESC;
- HGLRC Zeus Nono 350mW 5.8GHz VTX;
- Caddx Ratel 2 FPV camera;
- Motors:
- RaceWhoop30: 2105.5 3600kv (4S) or 2800kv (6S);
- RaceWhoop25: 2004 3000kv (4S) & 1800kv (6S).
- Gemfan 5-leaf propellers.
HGLRC Race Whoop30 in-depth review
Disclosure: I received this race-whoop as part of a product review collaboration with HGLRC. Product specs and quality may vary according to the manufacturer’s reliability, so I cannot guarantee that you will get a drone that performs the same as seen in my article.
Since the 1st of July, rules about importing products from China to Europe are significantly changed. Now, you have to provide proof of payment (bank statement), a copy of the order, and pay taxes (VAT) for every product, even if they have a price of just 1$. Luckily, the authorities understood my situation, and they released the package quickly. I received the RaceWhoop just in time, one week before the official release date, which is the 15th of July.
Arrived home, I immediately unwrapped the package to check its content.
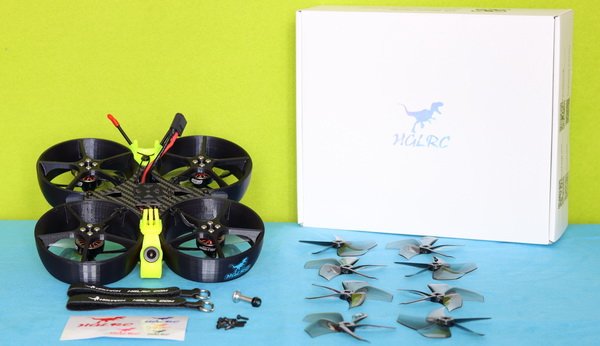
The HGLRC RaceWhoop comes fully assembled with the following accessories: two battery velcros, two sets of spare propellers, spare screws, FC user manual, and bonus HGLRC stickers. I opted for FrSky R-XSR radio receiver, which was pre-installed and wired nicely.
At a glance
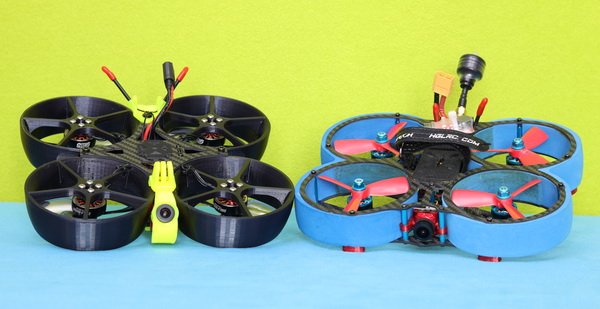
The HGLRC RaceWhoop30 isn’t small or light. It measures 195×195 mm and weighs 323 grams without a battery. In dimensions, it is comparable to the Veyron 3. Wheelbase (diagonal motor distance) is 145 mm. The 2105.5 3600kv motors are quite large for a 3-inch CineWhoop. Personally, I’m not a big fan of the pusher design. The props are super close to the ground, and I think they can suck dust into motors more easily.
Most CineWhoops have a full-size carbon fibre frame on which are installed the electronics, as well as the motors. Instead of this, the HGLRC RaceWhoop has a cross-type carbon fibre bracket that holds together the four 3D printed PCTPE ducts with the motors. PCTPE filaments are well known to be extremely flexible and resistant. The drone feels sturdy in my hand and I hope that up in the air will not have too much vibration between the joints.

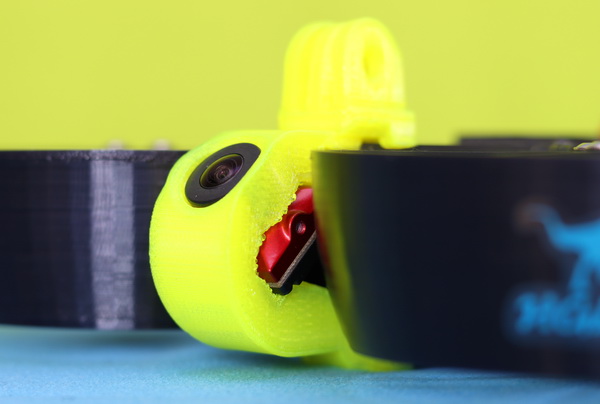
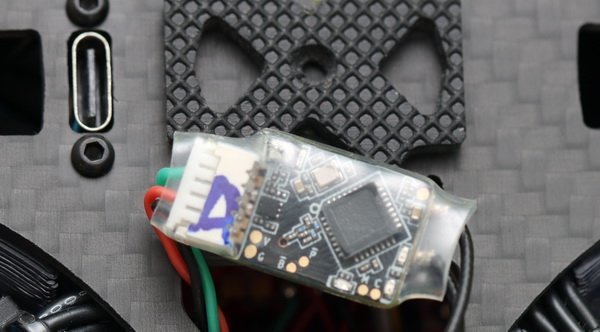
There is an HGLRC Zeus F728 stack (F722 FC + 28A ESC) with a 20x20mm mounting pattern between the two carbon fibre plates. The Caddx Ratel camera is installed on a fixed (no angle adjustment possibility) 3D printed camera bracket with a built-in action camera mount. For high-quality stabilized onboard recording you can opt for an SMO 4K or Insta360 GO2 camera.
If you want to upgrade it with a digital FPV solution, the F722 flight controller has a dedicated connector for this purpose, and there is enough room inside the frame for a Caddx Vista VTX. If you wish to go further with the upgrades, even a GPS module can be installed for fail-safe RTH.
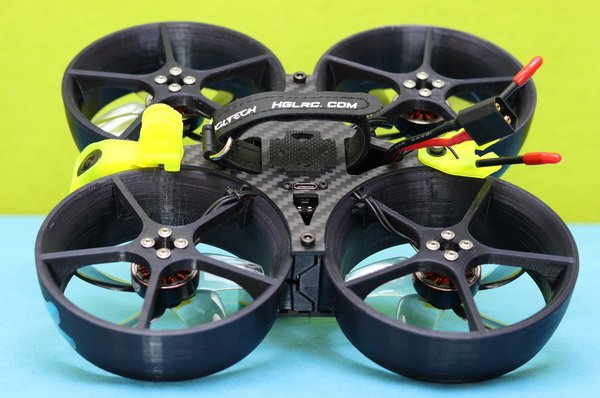
The top plate has an anti-slip rubber padding for the battery. The RaceWhoop30 comes with an XT60 LIPO plug. The 5.8GHZ VTX antenna is small and almost built-in, so it will not be ripped off during crashes.
Price and Availability
The RaceWhoop30 (4S and 6S) can be ordered from HGLR with a starting price of $309.99 (PNP). This price includes two sets of GEMFAN D76mm spare propellers. You choose from 4 types of optional radio receives (FrSky XM+, Crossfire Nano, FrSky R-XSR, FlySky, and R9mm OTA).
HGLRC RaceWhoop: Initial setup
HGLRC’s RaceWhoop series comes fully assembled and ready to fly out of the box. Practically, the only things you need to do are to bind with your transmitter and make some basic settings in the BetaFlight configurator. Of course, you will also need a charged LIPO pack as well. Something between 850-1300mAh should be just fine.
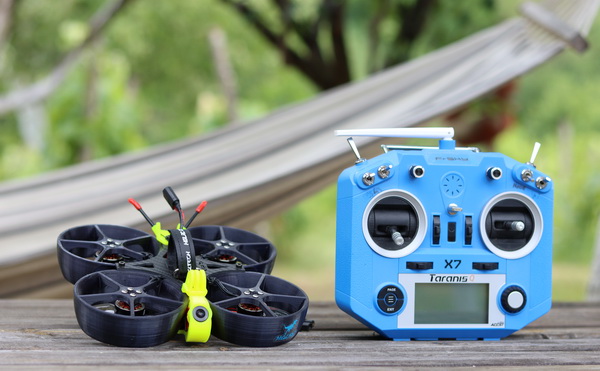
For binding, you need to have access to the radio receiver. The wires have the right length allowing to pull out the R-XSR module from inside the drone. Either I’m getting too old or these F/S binding buttons are smaller and smaller. I needed a toothpick to press the tiny button during the pairing process. When the green LED turns solid, the binding process is done. Signal strength and system voltage were automatically displayed on my Taranis Q X7 remote controller.
I always make a full dump of the stock configuration before doing any changes in BetaFlight. I suggest you to making the same. After I assigned my favourite switch layout and enabled Air mode, I performed with OSD configuration. You can display battery voltage, flight time, and other useful info. These steps are pretty much what needs to be done in order to get it in the air.
HGLRC RaceWhoop30: Flight experience
For FPV flights I used my DJI Goggles V2 paired with an analogue receiver. The Caddx Ratel 2 camera knows about its excellent low-light performance, but it provides good image quality in strong daylight conditions as well. VTX power is set to 25mW by default, which is enough only for short proximity flying around your house.

With the stock mount, the camera angle is too aggressive for newbies. As mainly only the sky is visible they will lose orientation and crash quickly. I know that this Whoop is optimized for racing, where 40° at least is recommended, but a mounting part with angle adjustment would be a real help for all types of FPV pilots.
For the fun, I bumped into various things in my backyard, of course, not at top speed. In most cases not even crashed, I was able to regain control and continue my flights.

With a fully charged 4S 1300mAh battery pack, I got an average of 4-5 minutes of flight time. In strong wind, the blade guards act like sails, reducing manoeuvrability and flight time.
Remember that while the battery is connected it gets hot very quickly. I suggest you get in the air immediately and disconnect the LIPO asap after you landed.
Summary
I like the concept of this RaceWhoop! It efficiently combines power with durability. I crash it few times and it remained in one piece. I managed to break only one prop while I tested turtle mode (auto-flip-back).
Being heavy, battery life isn’t too great, you can expect 4-5 min with a 1300mAh pack and 5-7 min with a 1800mAh one. Weighting almost 500 grams with a battery, it requires FAA registration!
Pros
- Ready to fly out of the box;
- Super durable;
- Easy maintenance if you have a 3D printer;
- Multiple sizes and power options;
- Easily accessible USB Type C port;
- DJI FPV ready flight controller.
Cons
- Quite heavy;
- Pretty exmensive;
- Heats up quickly;
- Camera angle is too ‘aggressive’ for newbies;
- No FPV camera angle adjustment possibility.